25
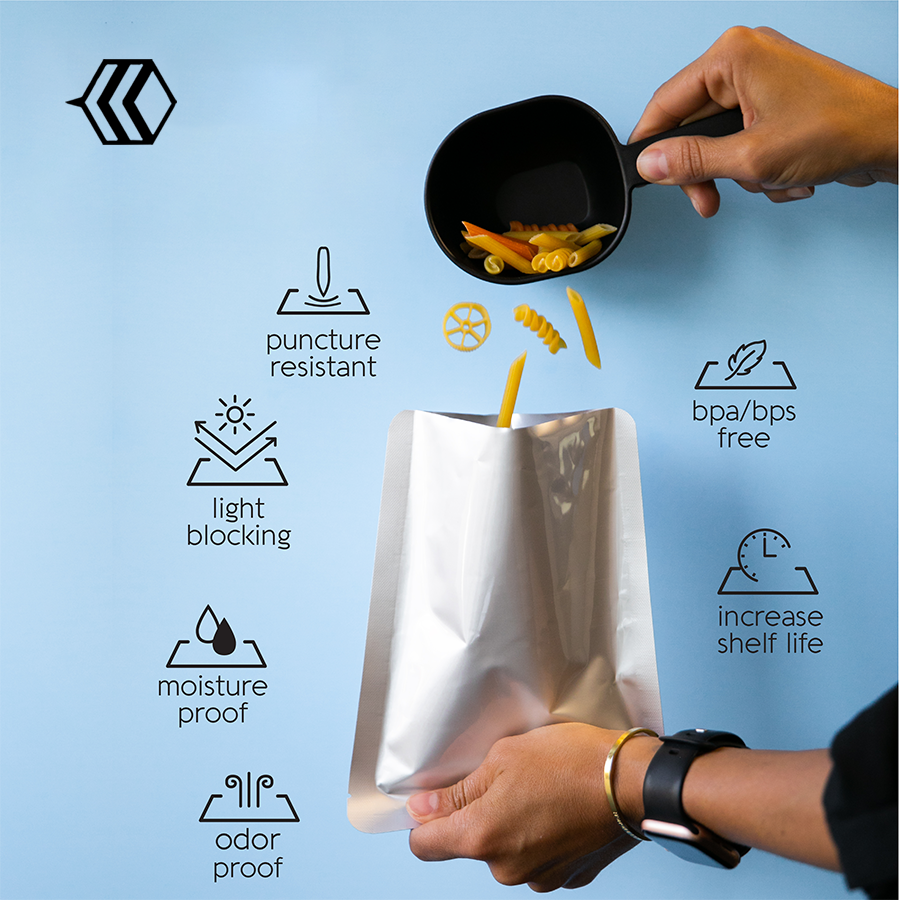
“Seal mylar bags offer superior security for your items thanks to their airtight seal as well as durable design. Make sure your products are in good condition and safe with these durable packaging options.”
The effectiveness of food storage depends on proper packaging. Mylar bags can be an excellent instrument for longer-term food storage. However, it is essential to ensure that the bags are airtight. There are several methods to actually achieve this based on the items you’ve got available. It is recommended to begin this process by having all the materials laid out. Ensure you have your food ready and the right number of heat sealable mylar bags and oxygen absorbers. It would help if you also had the choice of heating sealing. Use other tools like labels and a pen to mark your items.
Also, you might want to consider a different layer of protection, like a food-safe bucket, which can seal with Mylar bags and placed in it.
Make sure you’ve considered how many bags you’ll require and how many oxygen absorbers to use based on your volume (more about that later in the following article). Keep everything in a place that is accessible so the oxygen absorbers won’t become ineffective. While sealing bags, leave a tiny gap (about six inches) to allow you to add an oxygen absorber before closing the bag.
Here are a few of the accurate methods to secure mylar bags when they’re filled:
- Impulse sealer: These are generally costlier, but they are extremely effective in sealing Mylar bags quickly and evenly. Place the bag’s edge with the edge of the heated bar, and squeeze the lever for about 2 seconds.
- Hair straightener: If you’ve got an excellent quality available, place the bag’s ends inside the clamp and run it from the end to the end before sealing the clamp. This is accurate using straighteners made of metal but not with ceramic straighteners.
- Clothing iron: Most people own this device in their homes, and it is ideal for sealing bags. Adjust the setting to wool. A couple of passes across the bag can create a fantastic seal that can use safely for the bag and iron.
Excited To Know How Seal Mylar Bags?
Heat sealing mylar bags require three main ingredients: heat, pressure, and timing.
The techniques must refine to achieve the three together to create a secure seal. The best seals can create with a temperature of between 375 to 425 degrees Fahrenheit, depending on the material’s thickness and the heating element’s size. At this temperature, BOPET can mold, which allows two sheets of BOPET to join effortlessly without melting or damaging the fabric.
Thus, a typical household heating element is usually not heated sufficiently to give the required heat of a quality heat seal. This typically requires bigger industrial machines that can hold high temperatures for an extended duration while offering accuracy and reliability. The proper seal requires a certain amount of pressure when the reaction between heat and chemicals occurs. If there isn’t the proper pressure level, the seal might fail to form correctly, opening up for oxygen and other components to escape through the bag’s top. This is why industrial heat sealing machines come with an axis that allows pressure to be applied via hand or hydraulic parts.
The highest-priced machines automate this process so that technicians are not required to apply pressure constantly as they move hundreds of units. The third ingredient in bringing both pressure and heat is time. The duration required for heating a seal can vary depending on two other variables.
However, it will last approximately two to three minutes. It could take longer when using less pressure or heat, and therefore, manufacturers need to synchronize all three of these elements to obtain an even seal each time.
How Do You Seal A Mylar Bags
Now that you’ve got your bags set, let’s begin methods of sealing them!
- Heat Sealing
As the name implies, heat sealing is a process where pressure and heat form a secure seal. By doing this, the heat sealer mylar bags preserve the high quality and freshness of the food contained within. If you want to seal the heat in your hair, use a clothes iron or hair straightener.
Here are the necessary steps:
- Set the bag flat onto an ironing board.
- Carefully squeeze any surplus air.
- The clothes iron should be set to medium-high temperatures
- When the iron has reached a hot temperature, gently run the iron’s tip across the top 1 inch (2.5 centimeters) from the top.
- Be sure to slide the iron along the bag’s length until it is sealed.
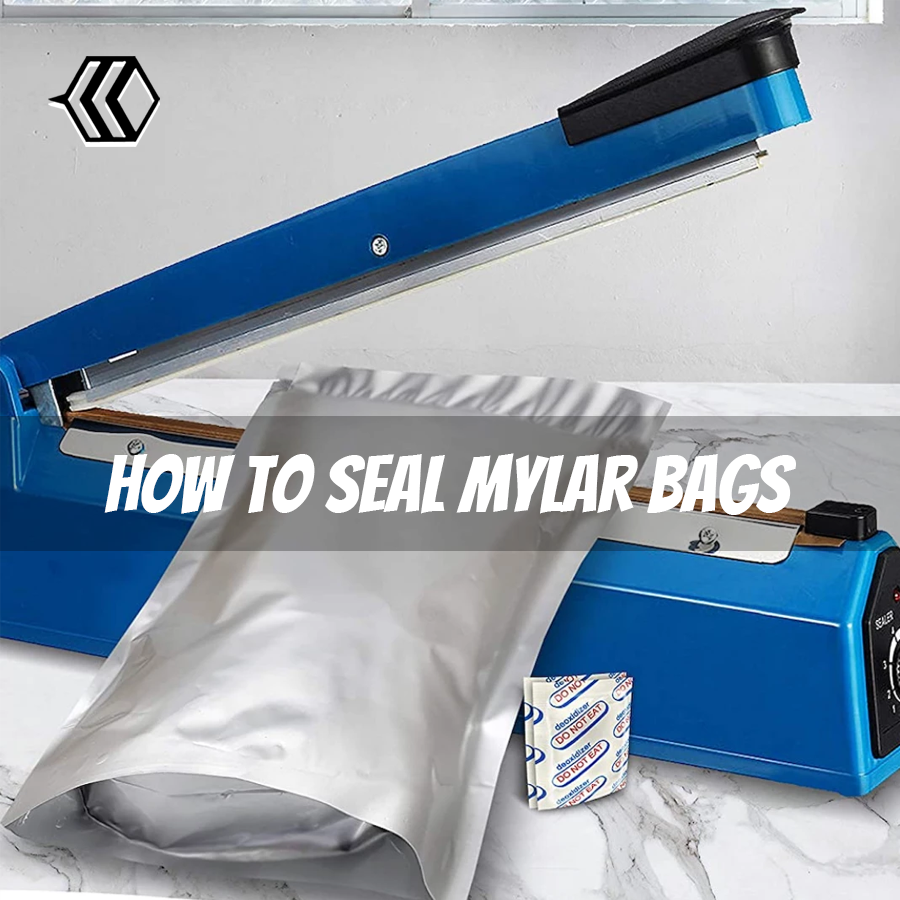
- Impulse Sealing
This is a different method of sealing mylar bags called impulse sealing. An impulse sealer is essentially an instrument that utilizes the power of a current to generate heat. It also fuses the edges of the seal mylar bag, resulting in an airtight seal.
How can you seal mylar bags using the benefit of an impulse sealer?
- Make sure you fill your bags with your food items.
- There should be a space on the top to seal
- Add oxygen absorbers
- Insert the impulse sealer
- Set the temperature
- Create the timer according to the manufacturer’s instructions.
- Set the open edge of the mylar bag in between the bars that seal the sealer impulse and squeeze to seal.
- The sealer melts and secures the bag
- It is possible to seal the entire long-length
- Make sure there aren’t wrinkles or gaps in the seal
- Vacuum Sealing
These are the proper techniques for heat seal mylar bags.
- Connect the vacuum sealer, and then adjust the time and temperature settings according to the manufacturer’s instructions.
- Mylar bags of different thicknesses might require different amounts of heating and duration to seal properly.
- The end of the bag with mylar over the valve port on the sealer, and then press the button to start.
- The vacuum sealer can take the air out of the bag and heat and seal it.
- And then seal the bag on the opposite side.
- Check for wrinkles or gaps within the seal.
- Ziplock Sealing
What are some of the ways to secure a Ziplock Seal?
- Ready your heat source, and allow it to heat up
- Set the temperature and timing setting
- The ziplock seal should be placed on an even and hard surface
- Use the pressure source all the way along the length of the ziplock seal.
In Conclusion
It is no surprise that sealed bags of mylar are the ideal option to maintain the freshness and flavor of food for a longer time.
We hope you’ve found this post interesting. Sealing custom mylar bags that adhere to the steps above can protect the nutritional content of food products. Contact us at Packaging Bee to discuss further concerns. We would be happy to serve you.